Categories
Linux Tech

Install CentOS 8

Download the latest CentOS 8 ISO from: https://www.centos.org/download/

Define a VM and boot to installer.

The first install screen you are presented with is the language selection screen.

CentOS 8 installation – language selection screen

After selecting your language you are presented with the Installation Summary screen. At the bare minimum you will need to specify the installation destination in order to proceed.

CentOS 8 installation – installation summary screen

Click on Installation Destination

CentOS 8 installation – installation destination screen

Keep defaults and click done (unless you want to manually create partitions or enable encryption).

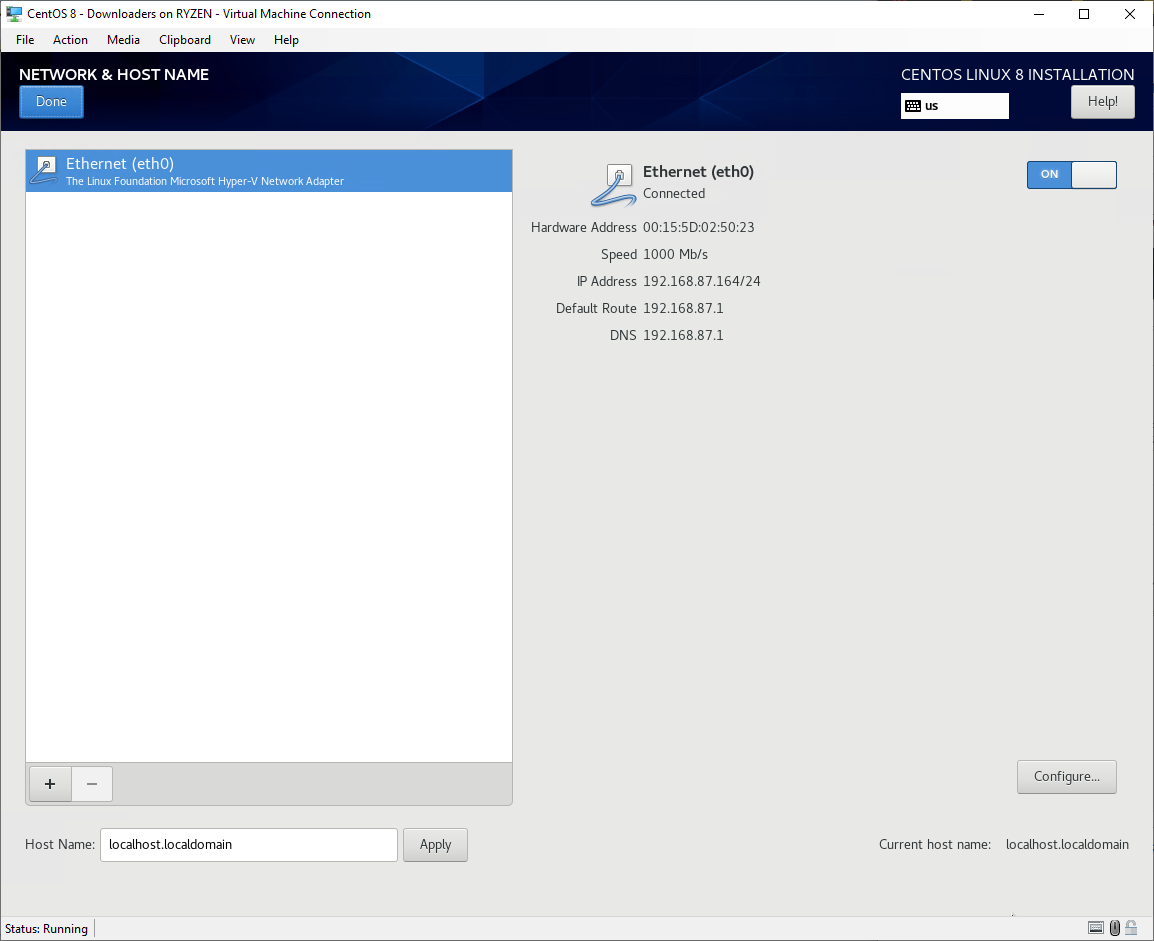
Optional step – enable Ethernet adapter and set hostname.

CentOS 8 installation – Network & Hostname screen

Optional step – select base environment and optional software to install.

CentOS 8 installation – Software Selection screen

Once back on the installation summary screen, click the Begin Installation button.

The installation will begin and you are shown the following screen while the install takes place in the background.

CentOS 8 installation – Configuration screen

Set Root password and create a new user if you wish.

When the installation is complete the reboot button will appear – click reboot. That’s it!

Post installation, login and run the “yum update -y” command to perform package updates.

Categories
Linux Tech Windows

How to import ed25519 keys for use in Putty (on Windows)

Go to your ssh key dir and print the contents of the private key file (id_ed25519) in my case.

Create a new text file and paste the contents of your private key file inside and save.

Open PuTTY Key Generator

Click File → Load private key

Select all files from file extensions

Open text file containing your key

The key is imported now.

Now, you can save your private key in PuTTY’s weird format.

Click on ‘Save private key’

Categories
Linux Security Tech

How to generate and install ed25519 SSH keys on Linux (CentOS 7)

The following command generates a public and private ed25519 key pair.

ssh-keygen -t ed25519

Enter a password to protect the key if you wish then hit enter.

Private and public keys have now been generated and are stored in the location listed

Next step is to install the private key on the server

 ssh-copy-id andre@localhost

Verify fingerprint to make sure you are connecting to the intended server.

Enter your password.

This public key has now been added to the server.